개요
SwiftUI에서는 흔히 MVVM이나 TCA 같은 아키텍처를 적용해 상태 관리와 화면 구성을 설계한다. 나 역시 TCA나 ReactorKit처럼 단방향 데이터 흐름을 보장하는 구조를 선호해왔다.
하지만 혼자 진행하는 작은 프로젝트에서는 TCA가 다소 무겁게 느껴졌다. 큰 의존성을 추가하지 않고도, TCA의 핵심적인 장점을 가져올 수 있는 경량화된 구조를 직접 만들어보고자 했다.
목표
- Feature별 State, Action, Reducer 생성하여 상태 값 관리와 비동기 작업 관리
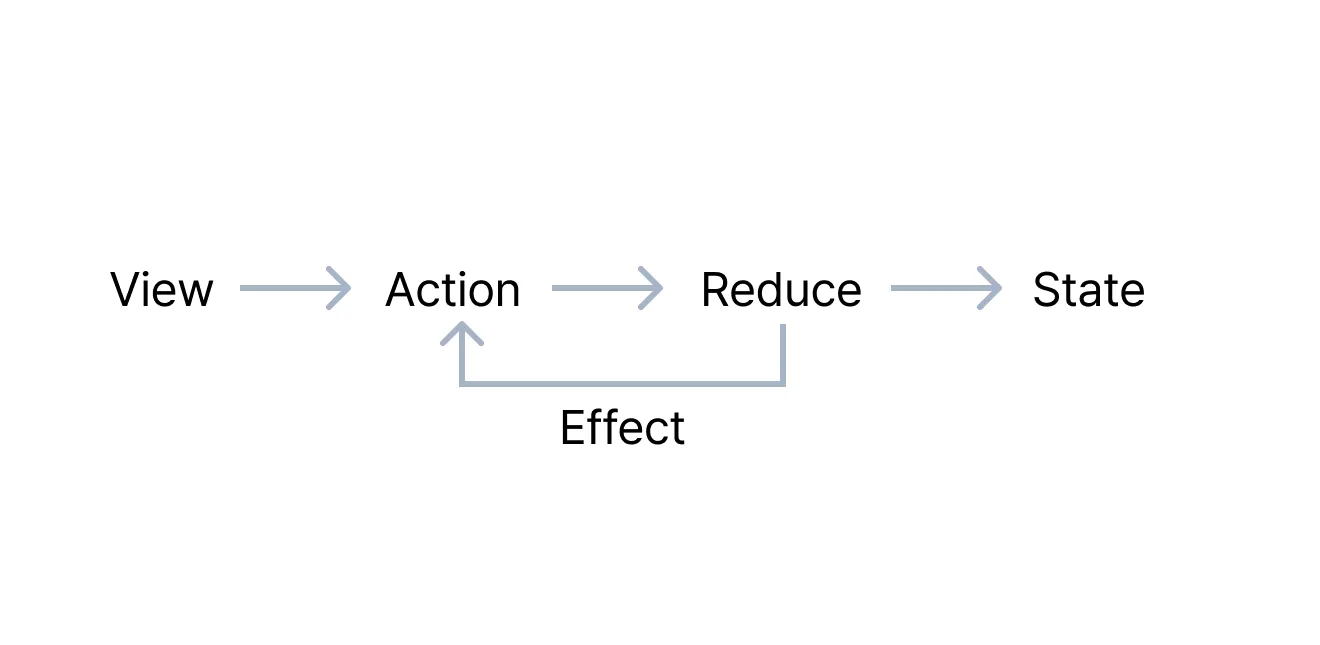
- View에서 Action을 요청하고, 상태 변화를 통해 UI가 업데이트되는 흐름 설계
- 외부 의존성을 분리하고, Store 생성 시 주입할 수 있도록 구조화

구현해보기
Effect 타입
Effect는 Action을 받은 뒤 수행해야 하는 추가 작업을 표현하기 위한 타입이다.
enum Effect<Action> {
  case none
  case send(Action)
  case run((@escaping (Action) -> Void) -> Void)
}.none: 추가 작업 없음.send(Action): 새로운 Action을 보냄.run(): 비동기 작첩을 수행한 후 Action을 보냄
StoreProtocol
모든 Store가 공통으로 가져야 할 기능을 정의한다. send를 통해 Action을 전달하면 reduce가 실행되고, 그 결과 반환된 Effect를 처리한다.
@MainActor
protocol StoreProtocol: ObservableObject {
  associatedtype State
  associatedtype Action

  var state: State { get set }
  func reduce(state: inout State, action: Action) -> Effect<Action>
}
핵심 메서드:
send(_:): Action을 받아 State를 변경하고 Effect를 실행handle(_:): Effect에 따라 추가 작업 실행
Store 예시 살펴보기
각 Feature는 고유한 Store를 가진다. StoreProtocol을 채택하고, State, Action, Reduce를 정의한다.
View에서 변경된 State에 따라 UI를 업데이트를 하기 위해 state를 @Published 로 인스턴스를 생성한다.
final class CounterStore: StoreProtocol {

  private let counterClient: CounterClient
  @Published var state: State

  init(client: CounterClient) {
    self.state = State()
    self.counterClient = client
  }

  struct State {
    var count: Int = 0
    var text: String = ""
  }

  enum Action {
    case increase
    case random
    case fetchComplete(Int)
  }

  func reduce(state: inout State, action: Action) -> Effect<Action> {
    switch action {
    case .increase:
      state.count += 1
      return .none
    case .random:
      return .run { send in
        Task {
          let random = await self.counterClient.fetchRandomNumber()
          send(.fetchComplete(random))
        }
      }
    case let .fetchComplete(num):
      state.count = num
      return .none
    }
  }
}
외부 의존성 주입
API 호출 등 외부 작업은 Client로 분리하고, Store 생성 시 주입한다. 이렇게 하면 테스트와 확장성을 확보할 수 있다.
struct CounterClient {
  var fetchRandomNumber: () async -> Int
}

extension CounterClient {
  static let live = CounterClient {
    try? await Task.sleep(nanoseconds: 1_000_000_000)
    return Int.random(in: 1...100)
  }

  static let mock = CounterClient {
    42
  }
}
View에서 사용해보기
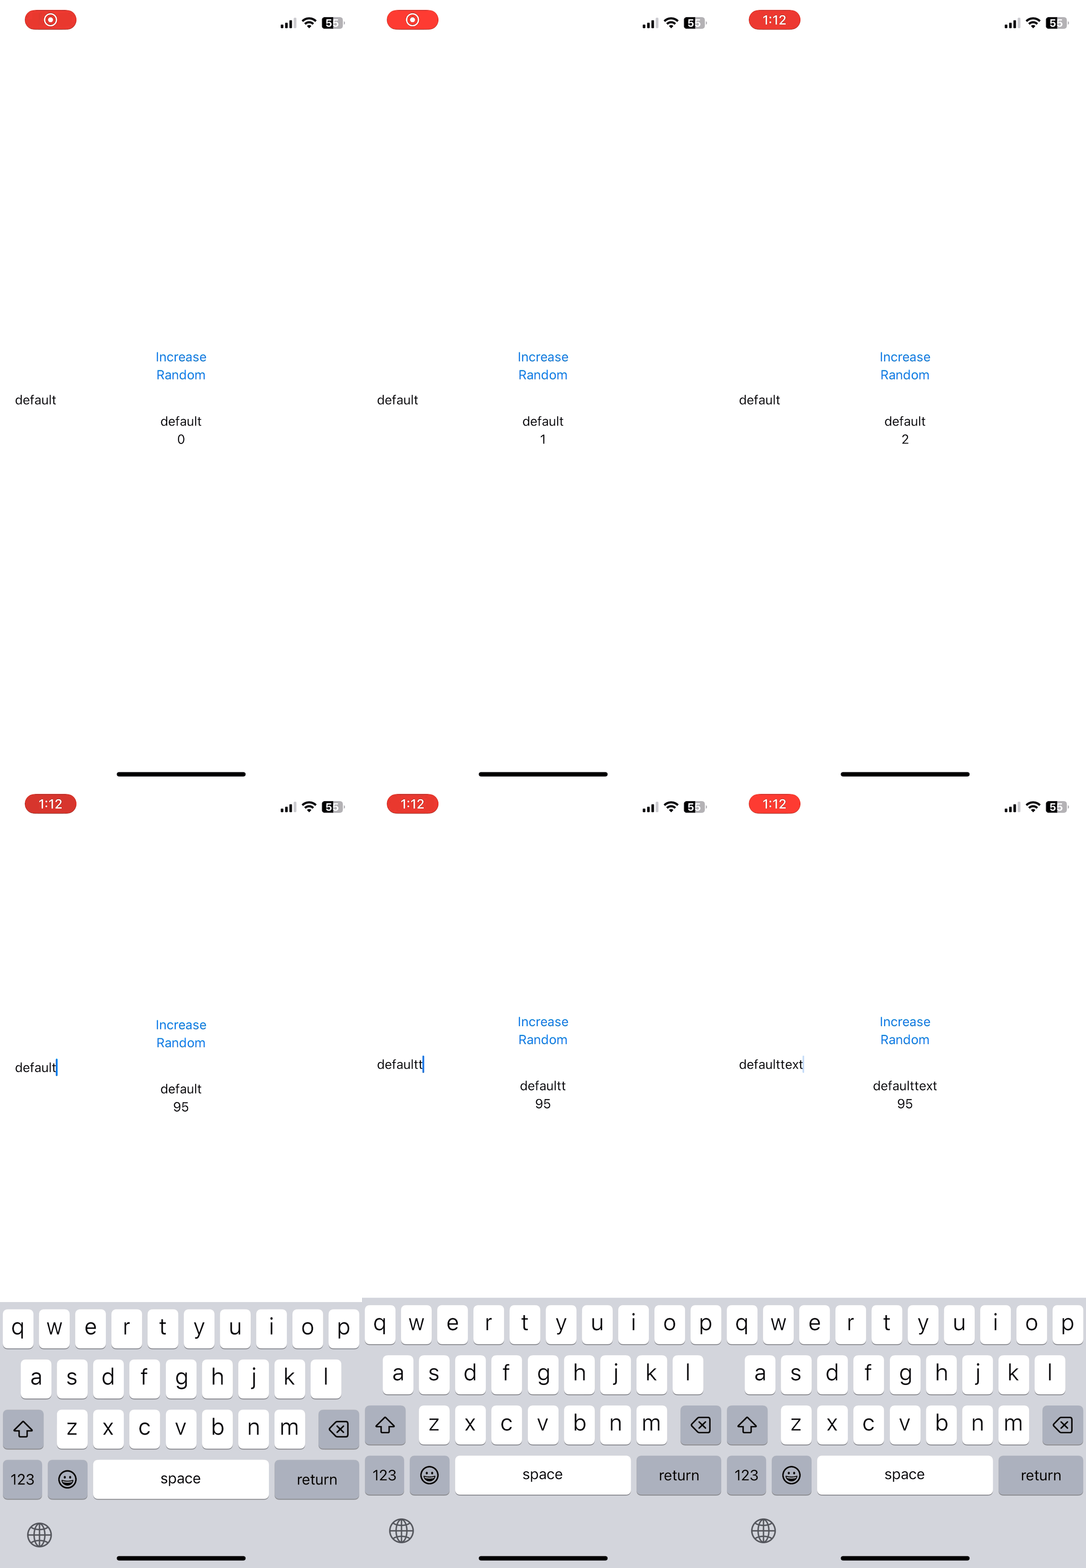
View는 @StateObject로 Store를 가지고, store.state를 읽고 store.send(_:)로 Action을 전달한다.
struct ContentView: View {
  @StateObject private var store = CounterStore(client: .live)

  var body: some View {
    VStack {
	  Button("Increase") {
	    store.send(.increase)
	  }
	  Button("Random") {
	    store.send(.random)
	  }
	  TextField("textfield", text: $store.state.text)
	  Text("\(store.state.text)")
	  Text("\(store.state.count)")
    }
	.padding()
  }
}
정리
이번 구현을 통해, 작은 프로젝트에서도 TCA의 장점을 살리면서 더 가볍게 단방향 흐름 구조를 설계할 수 있음을 확인했다. 복잡한 의존성 없이도 예측 가능한 상태 관리와 비동기 로직 처리가 가능했고, 이를 통해 내가 원하는 아키텍처 선택의 폭을 넓힐 수 있었다.